Bottling beer is a crucial step in the brewing process, allowing brewers to preserve their craft and share it with others. This process involves several key stages: preparing the beer by ensuring it is properly fermented and clear, sanitizing the bottles and equipment to prevent contamination, filling the bottles with the beer, and finally sealing and labeling them for distribution. Each step requires careful attention to detail to maintain the quality and flavor of the beer. Whether you're a homebrewer or a professional, understanding the bottling process is essential for producing a high-quality final product.
Explore related products


What You'll Learn
- Equipment Preparation: Gather necessary tools including bottles, caps, a bottling bucket, and a siphon
- Cleaning and Sanitizing: Thoroughly clean and sanitize all equipment to prevent contamination and ensure beer quality
- Carbonation: Add priming sugar to the beer to create carbonation, which will develop during the bottling process
- Bottling Process: Siphon the beer into bottles, leaving appropriate headspace, and cap them securely
- Storage and Aging: Store the bottled beer in a cool, dark place to allow carbonation to develop and flavors to mature
![]()
Equipment Preparation: Gather necessary tools including bottles, caps, a bottling bucket, and a siphon
Before you begin the bottling process, it's crucial to ensure you have all the necessary equipment on hand. This includes clean bottles, caps, a bottling bucket, and a siphon. The bottles should be thoroughly sanitized to prevent any contamination that could spoil the beer. You can sanitize them by boiling them in water for several minutes or using a commercial sanitizer.
The caps are equally important, as they create an airtight seal that preserves the beer's freshness and carbonation. Make sure to use caps that are compatible with your bottles and are also sanitized. A bottling bucket is essential for holding the beer while you bottle it. It should be large enough to accommodate the volume of beer you're bottling and should also be sanitized.
A siphon is a critical tool for transferring the beer from the fermenter to the bottling bucket without disturbing the sediment at the bottom. This helps to ensure that the beer remains clear and free of any unwanted particles. When using a siphon, it's important to start the flow of beer slowly and steadily to prevent any splashing or agitation.
In addition to these basic tools, you may also want to have a bottle filler on hand. This device helps to control the flow of beer into the bottles, making the process more efficient and reducing the risk of spills. A bottle filler typically attaches to the end of the siphon and has a valve that can be opened and closed to control the flow of beer.
Once you have all your equipment prepared and sanitized, you're ready to begin the bottling process. Remember to work in a clean and organized space to minimize the risk of contamination. With the right tools and a little practice, bottling your own beer can be a fun and rewarding experience.
Chilled Brews: The Ultimate Guide to Bottled Beer Storage
You may want to see also
Explore related products


![]()
Cleaning and Sanitizing: Thoroughly clean and sanitize all equipment to prevent contamination and ensure beer quality
Before bottling beer, it's crucial to thoroughly clean and sanitize all equipment to prevent contamination and ensure the quality of the final product. This process involves more than just a quick rinse; it requires careful attention to detail and the use of specific cleaning agents.
First, all equipment, including bottles, caps, and filling apparatus, should be washed with a mild detergent and warm water to remove any residual beer, grease, or debris. This initial cleaning step is essential to ensure that the sanitizing solution can effectively kill bacteria and other microorganisms.
Next, the equipment should be sanitized using a solution of bleach and water or a commercial sanitizing agent specifically designed for brewing. The concentration of the sanitizing solution should be carefully measured to ensure its effectiveness. Typically, a solution of one tablespoon of bleach per gallon of water is recommended for homebrewers.
After sanitizing, the equipment should be allowed to air dry completely. This step is critical to prevent any water spots or residual moisture that could harbor bacteria. Once dry, the equipment can be stored in a clean, dust-free environment until it's time to bottle the beer.
In addition to cleaning and sanitizing the equipment, it's also important to ensure that the bottling area is clean and free of contaminants. This includes wiping down countertops, cleaning floors, and ensuring that all tools and utensils are properly sanitized.
By following these steps, homebrewers can ensure that their beer is bottled in a clean and sanitary environment, which will help to prevent spoilage and maintain the quality of the final product.
Bottle Opener Hacks: Using One Beer to Open Another
You may want to see also
Explore related products


![]()
Carbonation: Add priming sugar to the beer to create carbonation, which will develop during the bottling process
The process of carbonating beer is a delicate balance of science and art. When adding priming sugar to the beer, it's crucial to calculate the correct amount to achieve the desired level of carbonation. Too little sugar can result in a flat beer, while too much can lead to over-carbonation and potential bottle bombs. A general rule of thumb is to use 1-2 teaspoons of priming sugar per gallon of beer, but this can vary depending on the type of beer and the desired carbonation level.
Once the priming sugar is added, it's essential to mix it thoroughly with the beer to ensure even distribution. This can be done by gently stirring the mixture or by using a specialized bottling bucket with a spigot to allow for easy mixing and dispensing. After the sugar is fully dissolved, the beer is ready to be bottled.
During the bottling process, it's important to minimize the amount of oxygen that comes into contact with the beer, as this can lead to oxidation and off-flavors. This can be achieved by using a bottling wand or by carefully pouring the beer into the bottles. After the bottles are filled, they should be sealed and stored in a cool, dark place to allow the carbonation to develop.
The time it takes for the carbonation to develop can vary depending on the type of beer and the temperature at which it's stored. Generally, it takes about 2-4 weeks for the carbonation to fully develop, but some beers may require longer. It's important to monitor the bottles during this time to ensure that they're not over-carbonating, which can be indicated by the bottles becoming rock hard or the caps popping off.
One common mistake that homebrewers make is not allowing the beer to fully carbonate before drinking it. This can result in a flat, lifeless beer that doesn't have the desired mouthfeel or flavor. To avoid this, it's important to be patient and allow the beer to carbonate for the full recommended time.
In conclusion, carbonating beer is a critical step in the bottling process that requires careful attention to detail. By following these guidelines and being patient, homebrewers can achieve the perfect level of carbonation and enjoy a delicious, refreshing beer.
Exploring the Caloric Content of Budweiser Beer
You may want to see also
Explore related products


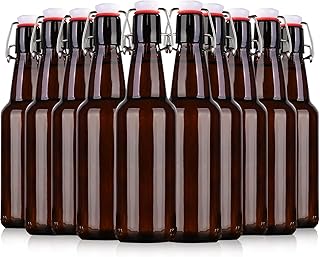
![8 Pack [1 L / 33 fl. oz.] Swing Top Glass Bottles w/ Airtight Stopper Lids – Flip Top Brewing Bottle for Fermentation, Kombucha, Mead, Vinegar, Beer, Kefir, Wine, Soda – With 8 Extra Seals & 2 Pourer](https://m.media-amazon.com/images/I/71Dxyt2F7pL._AC_UL320_.jpg)


![]()
Bottling Process: Siphon the beer into bottles, leaving appropriate headspace, and cap them securely
The bottling process is a critical step in beer production, requiring precision and care to ensure the final product is of high quality. Siphoning the beer into bottles is the first step, and it's essential to do so gently to avoid disturbing the sediment that has settled at the bottom of the fermentation vessel. This sediment, known as trub, can affect the clarity and flavor of the beer if it's stirred up and transferred into the bottles.
Leaving appropriate headspace is also crucial. Headspace refers to the amount of space left at the top of the bottle before capping. Too little headspace can lead to over-carbonation and potential bottle bombs, while too much headspace can result in a loss of carbonation and a flat beer. The ideal headspace will vary depending on the type of beer and the bottling equipment used, but a general rule of thumb is to leave about 1-2 centimeters of headspace for most beers.
Capping the bottles securely is the final step in the bottling process. This involves using a bottle capper to crimp the bottle caps onto the bottles, creating a tight seal that prevents air from entering and carbonation from escaping. It's important to use new bottle caps for each bottling session, as reusing caps can lead to leaks and contamination. Additionally, it's a good idea to sanitize the bottle caps before use to prevent any bacteria or wild yeast from being introduced into the beer.
After bottling, it's important to store the beer in a cool, dark place to allow the carbonation to develop properly. The beer should be left undisturbed for at least a few weeks to allow the flavors to mature and the carbonation to stabilize. Once the beer has had time to condition, it can be enjoyed by pouring it into a glass and savoring the fruits of your labor.
Creative Ways to Wrap Beer Bottles for Gifting and Storage
You may want to see also
Explore related products


![]()
Storage and Aging: Store the bottled beer in a cool, dark place to allow carbonation to develop and flavors to mature
Proper storage and aging are crucial steps in the beer bottling process, significantly impacting the final taste and quality of the beer. To ensure optimal carbonation and flavor development, it's essential to store the bottled beer in a cool, dark place. This environment helps to slow down the oxidation process, which can lead to off-flavors and spoilage.
The ideal temperature for storing beer is between 45°F and 55°F (7°C and 13°C). Storing the beer at this temperature range helps to maintain the carbonation level and allows the flavors to mature without becoming too pronounced or unbalanced. It's also important to keep the beer away from direct sunlight and heat sources, as these can cause the beer to become over-carbonated or develop undesirable flavors.
In addition to temperature, the storage environment should also be dark and free from vibrations. Light exposure can cause the beer to become skunky, while vibrations can disrupt the carbonation process and lead to sedimentation. To minimize these risks, it's best to store the beer in a dedicated beer fridge or a cool, dark pantry.
When it comes to aging, the duration will depend on the type of beer and the desired flavor profile. Some beers, such as IPAs and stouts, benefit from a longer aging period, while others, like lagers and pilsners, are best consumed fresher. As a general rule, most beers will reach their peak flavor within 3-6 months of bottling.
To ensure the best possible results, it's important to monitor the storage conditions and regularly check the beer for signs of spoilage or over-carbonation. By following these guidelines, you can ensure that your bottled beer develops the perfect balance of carbonation and flavor, resulting in a delicious and refreshing final product.
Effortless Label Removal: A Guide for Beer Bottle Enthusiasts
You may want to see also
Frequently asked questions
To bottle beer, you'll need bottles, caps, a bottle filler, a bottle capper, and a sanitizer solution. You may also want to have a thermometer, a hydrometer, and a siphon or racking cane on hand.
Sanitize your bottles and equipment by soaking them in a solution of water and bleach or a commercial sanitizer. Make sure to rinse everything thoroughly with clean water before use.
Use a bottle filler or a siphon to fill the bottles. Start by priming the bottle filler with beer, then gently lower it into the bottle and let the beer flow in. Avoid splashing and try to minimize the amount of air that gets into the bottle.